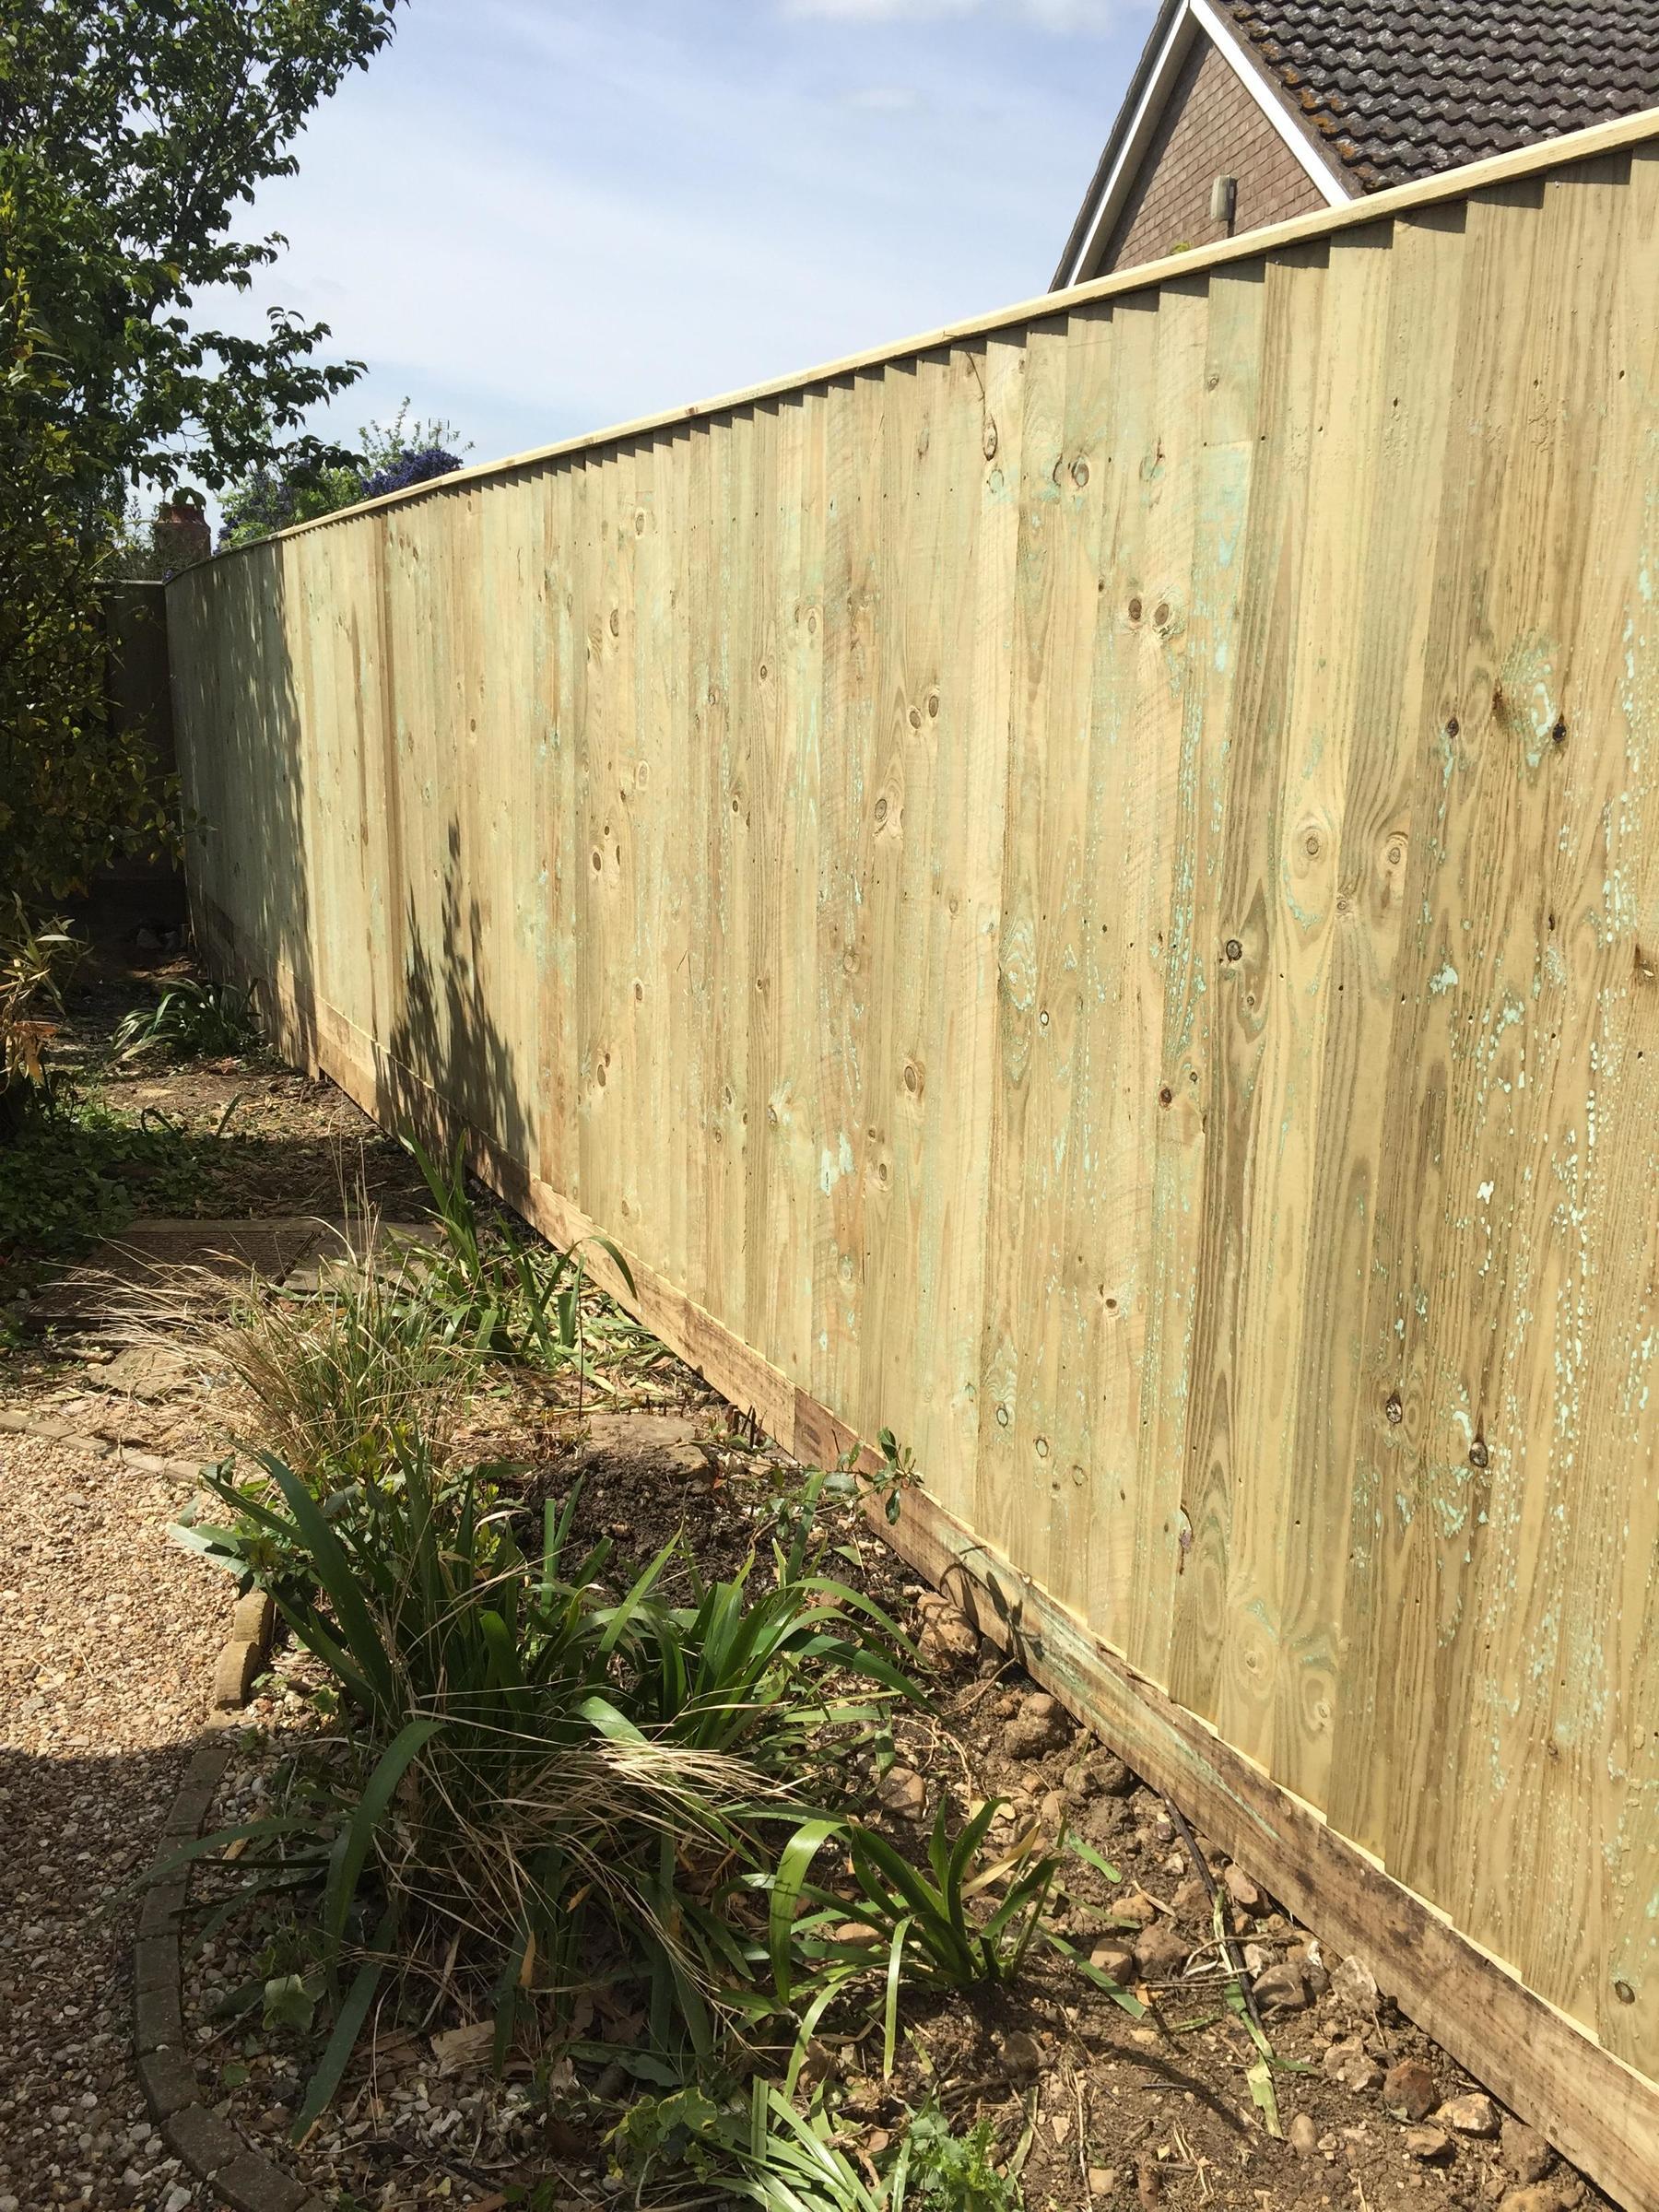
Want to know how to put up a fence that fits your garden and stays properly supported? This guide covers planning, property boundaries, tools and materials, setting fence posts, fitting fence panels and maintaining the finished fence. The exact installation process depends on the product and ground conditions, so use this article alongside the manufacturer's instructions.
How To Put Up A Fence: Start With A Practical Plan
Decide What Your Garden Fence Needs To Do
Before you build a fence, decide whether privacy, a decorative boundary or controlling access is the main aim. A wooden fence with closely fitted boards offers a different balance of screening and wind exposure from an open picket design. Gates, gaps at ground level and the strength of the entire fence also matter if you want a protective barrier for children or pets. A tall fence alone does not guarantee security.
Think about how the fence will affect your outdoor space. Mark the proposed route on a drawing and account for plants, paths, gate access and places where materials can be stored. Discuss the project with neighbours before starting, especially if access to their property is needed. Early planning helps you choose a fence style that offers the privacy and visual appeal you want without creating avoidable problems.
Which Way Should A Wooden Fence Face?
Some panel fence designs have a finished face on one side and exposed rails on the other. Offering the finished side towards neighbours can be considerate, but it is not a universal legal rule about fence ownership or direction. Other fence panels are constructed to look similar on both sides. Check any relevant agreement and decide the orientation before you install the fence posts, because the fixings and access for maintenance may depend on it.
Are you considering garden fencing installation or replacement?
MD Fencing & Decking work throughout Hertfordshire and Buckinghamshire, covering the A10 corridor from the start of the M25 up into Buntingford. Our services also cover Milton Keynes and nearby areas including:
Choose Suitable Fence Materials
For an open garden boundary, picket fences can provide an attractive alternative to solid fence panels. Compare timber species, preservative treatment, post sizes and the quality of the rails and framing. Wooden posts intended for ground contact need treatment suitable for that use; an above-ground paint finish does not provide the same protection. Choose the whole fence system before purchasing separate components that may not fit together.
Concrete posts with suitable gravel boards can separate timber fence panels from the soil, although heavy components require careful handling. A wooden panel fence may be easier to adapt on site, while vinyl and metal products have different fixing and maintenance requirements. Compare the initial cost, expected upkeep and repair options rather than assuming one material is always the most cost effective option.
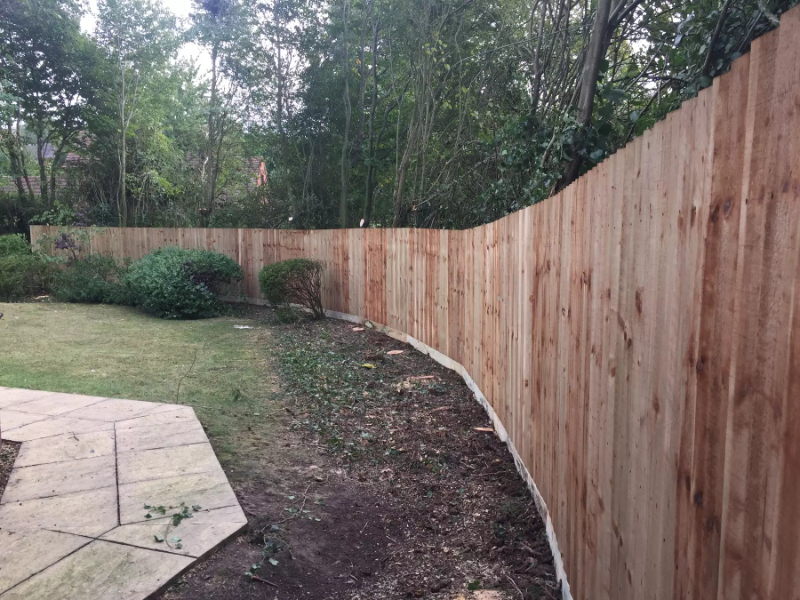
Plan The Purpose And Route

Compare Panels, Posts And Fixings
How To Measure Your Garden For A Fence
Measure each straight fence run separately and record changes in direction, gate openings and slopes. The width of fence panels is not necessarily the centre-to-centre spacing of fence posts: post width, grooves and fence clips can alter the required measurement. Before calculating how many panels to order, distinguish the clear opening between posts from the overall length between fixed points.
A fencing contractor can measure the proposed layout and advise on a suitable installation, but that does not automatically resolve disputed property boundaries. If you build a fence yourself, check the actual dimensions of the selected fence panels and gravel boards before setting any posts. Prefabricated panels make the layout more predictable only when their dimensions and fitting tolerances have been allowed for.
Confirm The Property Line Before Marking
Check ownership, responsibility and the intended fence line before replacing an old fence. Existing fence posts may be useful reference points, but their position is not proof that the property line is correct. Read the relevant title documents and any boundary agreement, and speak with neighbours if there is uncertainty. Settle the route before excavation or ordering custom fence panels.
Most Land Registry title plans show general boundaries rather than an exact surveyed line. A home floor plan is not a reliable substitute for boundary evidence. Where the property line is disputed, obtain appropriate surveying or legal advice rather than asking the installer to guess. Keep an agreed record of the proposed fence position and any arrangements for access, shared costs or future maintenance.
Locate Services And Other Obstructions
Before you dig holes or drive pegs into the ground, check for buried utility lines. Electricity cables, gas pipes, water pipes and drains may cross a garden in unexpected places. Plans can help with preparation, but they do not verify the exact position of every service. Arrange suitable locating and safe excavation methods; do not assume an area is clear because no pipework is visible.
Trees, roots, shrubs, paving and changes in ground level can affect the fence layout. Consider whether plants can be temporarily moved and later replanted, and avoid damaging important roots. If rocks or an unidentified obstruction appear while digging, stop and assess the situation. Moving the fence line may affect boundaries or panel dimensions, so do not reposition posts casually.
Measure And Mark Each Fence Bay
Once the route has been agreed and services have been checked, measure and mark the fixed points first: corners, ends and gates. Use a string line to establish the intended alignment where it is safe to do so. Mark each fence post position using the actual panel width and fixing allowance. A nominal six-foot panel is not interchangeable with every product described as 1.8 metres wide.
Check the complete layout before you dig post holes. Work out how many panels will fit, where a shorter bay is needed and whether the selected fence panels can be cut safely. Fence posts are not always set at intervals of the same length as the panel itself. Mark the outside faces or centres consistently, and allow for the required gate opening rather than using a leftover gap.

Check The Agreed Boundary
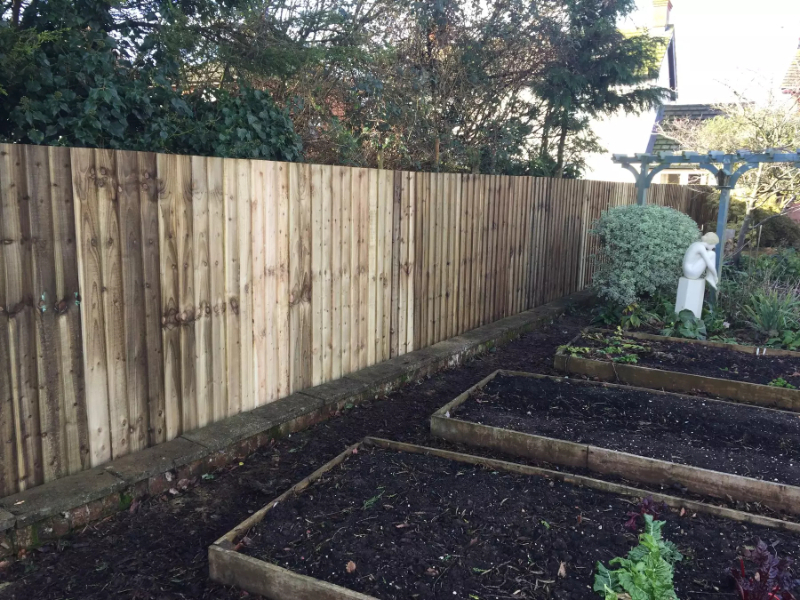
Measure The Individual Bays
Fencing And Neighbours' Boundaries
A physical boundary may be marked by a fence, hedge or wall, while the legal boundary depends on the relevant evidence. Before building, agree access arrangements and check that posts, concrete footings and fixings will remain within the permitted position. Do not remove a neighbour's fence or attach new components to their property without the necessary agreement. Unresolved boundary questions should be addressed before work proceeds.
Discuss the fence height, finish and likely disruption with neighbours. Explain when an old fence will be removed, how long access will be affected and whether plants near the fence line need protection. A written record can prevent misunderstandings about payment or responsibility. Consider the effect on light and garden use, but do not assume a friendly conversation settles every legal or planning requirement.
Choose A Fence That Suits The Site
A successful fence installation matches the product to the site as well as your preferences. Think about exposure to wind, ground conditions, privacy, gates and the space available for fitting fence panels. Wooden panel fencing can be a practical choice for garden screening, but its posts, rails, brackets and foundations must be suitable for the intended height and location.
The following considerations can help you compare options before you install a fence. A lower open design, solid panel fence and trellis-topped fence serve different purposes. Check the combined height of fence panels, gravel boards and any trellis before deciding on the layout. If you are unsure which design fits the garden, ask an installer to explain the benefits and limitations of each option.
For a more private garden, closely boarded panel fencing can reduce direct views from neighbouring paths or windows. Consider the view from seated areas as well as standing height before choosing fence panels. Climbing plants can enhance privacy, but their weight and growth need suitable support. A garden fence should not be treated as a retaining structure for soil or as automatic support for heavy planting.
Security depends on the whole arrangement, including gates, latches, fixings and gaps. A fence that is easy to climb or a gate left unlatched can undermine a taller boundary. Do not assume that an eight-foot fence is necessary or permitted. Check planning restrictions before adding height, and choose a design appropriate to children or pets; even a high fence may not contain a determined cat.
Fence panels can screen part of a garden without enclosing every boundary at the same height. Mark the sightline from the area you want to protect, then consider whether a shorter screen, trellis or planting would be enough. Where the ground slopes, a stepped panel fence may leave gaps below the panels. Plan those details before building rather than extending posts and panels after installation.
Solid fence panels catch wind, so exposed gardens need a suitable combination of fence posts, rails, fixings and foundations. Adding shrubs or trellis does not replace a proper support design. Early spring is not automatically a safe time to build a fence, and late autumn is not automatically unsuitable. Use the actual forecast and ground conditions, and postpone handling large fence panels when gusts make them difficult to control.
Check planning permission before ordering a tall fence or changing a boundary beside a road. Listed buildings, their surroundings, planning conditions and local restrictions may affect what you can erect. Rules can also differ across the UK. For a property in England, use current Planning Portal guidance and confirm any site-specific conditions with the local planning authority. Trellis and gravel boards contribute to the overall height.
Installing A Fence Safely
Before starting fence construction, make sure the layout, specification and tools are ready. Plan how you will move heavy fence posts and fence panels, and keep children and pets away from the work area. Use stable temporary supports and suitable protective equipment. If excavation, lifting or working beside buried services exceeds your experience, obtain competent assistance rather than improvising.
On flat ground, a panel fence can often follow a level top line. On a slope, choose a stepped or purpose-made raking system. Do not force rigid fence panels into an angle they were not designed to take. Gravel boards must also suit the change in ground level; a loose piece pushed into a gap is not a dependable substitute for a properly fitted board.
Wear gloves and safety glasses when handling timber, fixings and concrete. Cement-based materials can irritate skin and create hazardous dust; use the respiratory protection specified by the product's safety information rather than relying on any general dust mask. Keep materials secure and follow the manufacturer's instructions for handling, mixing and setting concrete. Avoid lifting heavy concrete posts or panels without a safe plan.
Use the correct tools for each step, including a power drill with the appropriate bit, a sound spirit level and exterior-grade fixings. Check cables on electrical tools and keep them clear of cutting and wet work. Dispose of timber offcuts, old concrete and other debris through suitable routes. Preserve labels and fitting instructions so the completed fence can be maintained with compatible materials.
How To Fit Fence Posts
1
Clear enough working space along the agreed fence line once the service checks are complete. Remove loose debris, and protect plants that will remain in place. If shrubs need to be moved, plan where they can be stored and whether replanting is practical. Mark the fence posts clearly so excavation follows the prepared layout rather than the position of the old fence.
2
Dig each post hole to the dimensions required for the fence design, post size and soil. A post hole digger can help form a narrow hole, but only after suitable service checks and with a safe method of work. There is no universal hole depth for every garden fence. Soft ground, tall fence panels and high exposure may require a different foundation specification.
3
Prepare the base of the post hole according to the chosen system. Where gravel is specified, use the stated material and thickness; do not assume that a shallow layer will solve drainage problems or prevent rot in wooden posts. Remove loose soil that would undermine the footing. If the hole fills with water or its sides collapse, stop and assess the foundation method before placing the post.
4
Place the first fence post in the prepared hole and check that it is vertical in two adjacent directions with a spirit level. Use suitable timber props or battens to hold it securely. Check its height and position against the string line. When fixing temporary supports to wooden posts, drill pilot holes where needed to reduce splitting and avoid damaging the finished faces.
5
Use the specified concrete mix or proprietary post-setting product. Some products are poured into prepared water while others are mixed first; follow the instructions for the material you have. Do not add water by guesswork. Keep the fence post steady, check its vertical position again and avoid loading it while the footing cures. Concrete posts must not be drilled or altered unless the supplier permits it.
6
Finish the top of the footing with a trowel as specified, avoiding a shape that collects rainwater against wooden posts. Leave the props in place for the required period and check alignment before the material hardens. Repeat the process for the other fence posts, measuring each bay carefully. Setting time and the time before attaching fence panels are not necessarily the same.

Set The Posts To The Specification

Check Alignment And Height
How To Install Fence Panels
1
Fit compatible gravel boards where the fence design requires them. Gravel boards keep the lower timber edge of fence panels away from direct soil contact and form the bottom of the bay. With wooden posts, l brackets may be one fixing option; slotted concrete posts use a different arrangement. Choose the correct bracket and screw length for the system rather than applying one dimension to every fence.
2
Before fitting fence panels, measure the finished opening and check that the posts are stable and the concrete has reached the required curing stage. Mark the positions of fence clips or brackets on both posts. A u bracket must suit the panel thickness and provide the support specified by the supplier. Keep the panel base clear of the soil and check that gravel boards are securely supported.
3
Use enough people or suitable lifting assistance to install fence panels safely. Place each panel on its intended support and check the top line with a spirit level. Attach the panel using the specified exterior-grade screws, nails or fence clips. Slotted systems may allow panels to slide into a groove, but heavy components still need controlled handling. Check the first bay before repeating the installation along the entire fence.

Support And Fix Each Panel

Use The Correct Panel Fittings
How To Cut A Fence Panel To Fit
1
First check whether the selected fence panels can be shortened without weakening their construction. Measure the required opening, allow for the specified clearance and mark the cut line clearly. For a timber panel designed to be trimmed, the framing battens may need to be repositioned before cutting. Follow the product's method and support the panel on a stable work surface.
2
Secure the replacement or repositioned batten as specified, then cut the panel flush with the intended outer edge. Do not remove a supporting rail simply to make the panel fit. Treat exposed timber ends with a compatible wood preservative where required, and check that the altered frame can accept the intended fixings. Use eye protection and keep hands clear of the cutting line.

Measure Before Cutting Panels

Retain The Supporting Frame
How To Attach Trellis To Your Fence
1
Plan trellis before setting the fence posts. The posts and foundations must support the combined fence and trellis height, as well as any intended climbing plants. Check the overall height against planning requirements. Trellis should attach to suitable structural members rather than relying on thin panel boards or a decorative post cap to carry its weight.
2
Measure and mark the trellis fixing positions, then use the specified brackets or fence clips. A u bracket is suitable only if its dimensions and fixing details match the trellis system. Do not invent a bracket count based on whether the garden feels windy; seek a suitable specification for exposed sites. Check the finished trellis for movement before encouraging plants to grow over it.

Plan Support For Trellis

Mark And Check The Fixings
Maintaining Your Completed Fence
Once installation is complete, keep a record of the materials, timber treatment and fixing details. Maintenance depends on the fence type and exposure. Inspect the garden fence after strong winds and at suitable intervals for leaning fence posts, loose fence panels, damaged boards and failing connections. Timely repairs can prevent a small defect from affecting neighbouring bays.
Keep soil, stored materials and dense growth away from timber that is meant to remain above ground. Check drainage at the fence base and avoid directing irrigation onto posts and panels. Clean the fence with a method compatible with its finish. Applying more coating does not restore strength to rotten wood or correct an unstable post footing.
Maintaining A Wooden Fence
Protecting The Timber
Before painting or staining treated wood, check the timber condition and the coating manufacturer's requirements. There is no fixed four-to-six-week wait that suits every treatment and weather condition. The surface must be ready for the chosen finish, with any required preparation completed. Apply compatible treatment to cut ends where specified, and allow the recommended drying time.
Timber protection depends on the original preservative treatment, exposure and upkeep. Do not promise that every paint lasts two years or every stain lasts five. Inspect for peeling, open joints and water absorption, then follow the product's maintenance guidance. A silicone based sealant is not a general substitute for wood preservative or an exterior coating system; only use it where the supplier specifies it.
Checking Posts, Panels And Fixings
Walk the fence line and check the base of wooden posts for decay, the rails for movement and the fence panels for loose boards. Look for protruding nails, splitting around screws and damaged fence clips. Check gravel boards and gate fixings as well. If a post leans or a footing moves, establish the cause before tightening the visible connections.
Small repairs are often easier before damage spreads. Replace broken pickets with suitable timber and use compatible fixings. A loose nail may need replacement or a repair to the supporting wood rather than simply being hammered back. Remove sharp projections and keep the area clear while working. If fence posts or major rails have deteriorated, ask whether replacing the affected section is safer than patching it.
Cleaning A Wooden Fence
Remove loose dust and debris with a soft brush, then use a cleaning method recommended for the timber and finish. A gentle wash may be enough for light dirt. Test an inconspicuous section first and let the wood dry before applying treatment. Aggressive pressure washing can damage the surface and force water into joints, particularly on weathered fence panels.
For algae or other persistent staining, choose a product intended for the material and follow its label. Protect plants, nearby finishes and drains from unsuitable runoff. Do not improvise bleach or acid mixtures, and never mix cleaning products. Cleaning can improve appearance, but soft timber, fungal decay or loose connections need repair rather than a stronger wash.


Maintaining A Metal Fence
Gentle Cleaning
Clean ornamental metal fencing using the coating supplier's recommended method. Mild soapy water and a soft cloth may be suitable, followed by a gentle rinse. Check joints and areas close to the ground, where dirt can collect. Avoid abrasive tools or high-pressure cleaning unless the manufacturer confirms they are appropriate for the finish.
If marks remain, establish whether they are dirt, corrosion or coating damage before choosing a treatment. A painted steel fence, galvanised component and powder-coated aluminium fence may need different care. Harsh cleaning can remove protection and make repairs more difficult. Check the condition of gate hinges and fixings while the surface is clean.
Repairing Coating Damage
Inspect for chips, scratches, corrosion and loose connections, particularly after impact or severe weather. Repair coating damage with products compatible with the metal and existing finish. If corrosion has reduced the strength of a post or rail, repainting alone is not sufficient. Keep gates secure and obtain advice where the condition of structural components is uncertain.
Prepare a damaged area using the specified method and apply the required primer and finish. Do not strip every metal fence to bare material by default, because galvanising and factory coatings can be damaged. Follow the repair-system instructions for preparation, drying and application. Keep a note of the product used so later repairs can follow the same approach.


Maintaining A Vinyl Fence
Cleaning And Checking Vinyl Panels
Vinyl fencing needs cleaning and inspection even though it does not require the same preservative treatment as timber. Use the manufacturer's recommended cleaner and a soft cloth or brush. Check panels, posts and connectors for cracks or movement. Keep abrasive equipment away from the surface and verify that any cleaner is suitable before treating visible areas.
Algae and stubborn stains may require a product approved for the particular vinyl system. Test it first and protect nearby planting. Do not assume household bleach, vinegar or a solvent will be harmless to every product. Follow the cleaning instructions and rinse as directed, without allowing concentrated chemicals to collect at the fence base.
For a long fence, work in manageable sections and keep access clear. A pressure washer may be unsuitable for some panels and connections, so check before using one. Cleaning is also a useful opportunity to spot damaged fixings or panels that have moved. Replace faulty components with compatible parts rather than forcing them back into a damaged slot.
Tools And Materials: Prepare Before Starting
The tools and materials needed depend on the fence system, but preparation usually includes measuring equipment, a spirit level, appropriate digging tools and suitable fixing tools. A post hole digger may be useful for cleared, service-checked ground, while other conditions need a different excavation method. Do not use powered digging equipment simply because it is quicker. Safe access, soil conditions and the location of cables and pipes determine which method is suitable.
For a timber panel fence, check the quantities of fence posts, fence panels, gravel boards, brackets and exterior-grade fixings. Add compatible fence post caps if the design uses them, plus any treatment required for cut timber. A power drill, correctly sized bits, a saw, a hammer and a trowel may be needed at different stages. Buy screws and nails specified for the connections; an indoor screw or an unsuitable nail can corrode or fail outdoors.
Plan handling as carefully as digging. Fence panels can be awkward to carry, and concrete posts and gravel boards are heavy. Arrange assistance or appropriate lifting equipment, clear a route to the work area and store components on a stable base. Keep tools and materials where they will not obstruct the garden or damage plants. Read the installation instructions before the first post hole is opened.
A Panel And Post Calculation You Can Check
Suppose a simple straight panel fence has four bays, each with a 1.8-metre clear opening, and five wooden posts each 100 millimetres wide. Its overall outside-to-outside length is 7.7 metres: 7.2 metres of clear bays plus 0.5 metres of post widths. The first-to-last post centre distance is 7.6 metres. This worked example shows why dividing a measured garden length by panel width alone can give the wrong result.
Those figures are an example, not a universal specification. A slotted concrete post system or face-mounted panel can use different fitting dimensions. Check the actual fence panels, gravel boards and post design before calculating the quantity. Gates, corners and separate runs change the number of posts needed, and a finishing bay may require a specially sized panel.
Allow for the final fit when ordering. A small dimensional error repeated along the entire line can leave the last panel too wide or too narrow. Measure and mark each bay on the drawing, then check the proposed openings on site. Confirm whether the supplier permits panels to be shortened and whether matching gravel boards can be adapted in the same way.
Current Weather Figures: Why The Forecast Matters
Recent weather illustrates why a season alone is not a reliable installation plan. The Met Office report on Storm Dave records a 93 mph gust at Capel Curig in Gwynedd during the storm of 4–5 April 2026. Aberdaron recorded 83 mph, while Emley Moor and St Bees Head recorded 75 mph. These are observations from those locations, not design wind speeds for a garden in Buckinghamshire or Hertfordshire.
For your fencing project, check the local forecast and actual site exposure before handling fence panels. Large panels can become difficult to hold when gusts catch them, even before they are attached. Stop if handling or temporary support cannot be controlled safely. Once installed, the fence needs suitable posts, rails, fixings and foundations for its intended location; a weather statistic does not establish that design.
Wind is only one factor. Saturated ground can affect excavation and footing preparation, while unsuitable temperatures or rainfall can affect concrete and coating work. Follow the product's working conditions and curing instructions. Build a fence when the site and forecast allow safe work, rather than assuming a fixed month offers the best chance of success.
Boundary Evidence And Current Height Guidance
GOV.UK explains that most title plans show general boundaries, and that there is usually no record of the exact boundary or who owns a fence, hedge or wall. This is why an old fence, the direction of its rails or a floor plan should not be treated as conclusive evidence. Where the boundary is unclear, settle the question before starting fence construction.
For England, the Planning Portal guidance sets out the usual permitted-development height thresholds: one metre beside a highway used by vehicles, including its footpath, and two metres elsewhere. Listed-building circumstances and removal of permitted-development rights can change the position. Conservation areas may also affect removal work. Confirm the requirements that apply to your site before ordering.
Measure the proposed overall height, including gravel boards and trellis, rather than the fence panel alone. Replacing an already taller fence may have different implications from increasing its height. If the garden slopes, ask how the relevant measurement applies instead of guessing. Keep the agreed route, chosen height and any required permissions together with the installation plan.
Choosing Brackets, Fence Clips, Screws And Nails
Fence clips and brackets transfer loads between fence panels and fence posts. Select hardware that suits the panel thickness, post material and required connection. A u bracket that fits a narrow timber frame may not suit a thicker panel, while l brackets can serve a different fixing arrangement. Use the manufacturer's specified number, position and fixing method; there is no reliable bracket count for every fence.
When attaching timber, drill pilot holes where the fixing or timber instructions call for them. Pilot holes can reduce splitting, particularly near board ends, but their size must suit the screw and connection. Use the correct length so the fixing engages properly without projecting through the far face. Do not substitute a short screw for a structural fixing just because it is easier to drive.
Nails may be specified for boards or rails in some wooden fence designs. Choose the nail type, coating and size intended for the application, and check that the hammer can be used without damaging the panel frame. Do not mix nails and screws indiscriminately in the same joint. If you find loose nails during maintenance, inspect the timber they enter before deciding whether to replace the nail, repair the joint or replace the affected piece.
Slotted concrete posts hold compatible fence panels differently from timber posts fitted with clips. Do not drill concrete posts or alter their grooves without approval from the supplier's instructions. Check that the panel can slide into the slot and bear on its intended support without being forced. Similar-looking hardware does not necessarily provide the same connection.
Gravel Boards And Post Caps: What They Actually Do
Gravel boards form the lower part of many panel fence systems. Their main role is to separate timber fence panels from direct contact with soil and to suit the planned bay arrangement. They do not automatically solve drainage problems, and ordinary fence gravel boards should not be assumed to retain a bank of soil. Raised beds beside a fence may need independent retaining support.
Timber gravel boards need an appropriate treatment for their exposure, while concrete gravel boards must fit the chosen concrete posts and be handled safely. Keep the required ground clearance and make sure the ends have the specified support. On a sloping site, the design may step the gravel boards or use a different detail. Do not fill every gap with loose bricks or scrap timber.
Fence post caps cover the tops of suitable wooden posts and can add a neat finish. A post cap may help shed rainwater from the top surface, but it does not protect the buried section of the post from decay. Choose a cap that fits the post dimensions and attach it using the specified fixing. A cap that is too tight or badly fitted can split timber or leave places where moisture collects.
Inspect each post cap as part of routine maintenance. Replace a cracked cap or loose fixing before it becomes a sharp projection or falls into the garden. Fence post caps cannot make an unsuitable timber post fit for ground contact, and a decorative post cap is not a support point for trellis, lights or a gate. Keep those functions separate when planning the fence.
Setting Posts Without Losing The Alignment
It is tempting to install posts quickly and correct the panel openings later, but fixed fence posts are difficult to reposition once concrete hardens. Check the first post carefully, then measure to the next post using the required bay dimension. Verify both alignment and height while the props are still in place. A correctly measured first bay provides a useful reference, but each later bay still needs checking.
Do not let the string line pull a post out of position, and do not rely on the string alone to confirm that the post is vertical. Check two adjacent faces with a spirit level. Temporary props must hold the post without creating trip hazards or intruding onto unagreed land. Leave them in place until the footing can provide the required support.
Concrete mix, ready-mixed footing concrete and proprietary post-setting products do not all follow the same mixing sequence. Use the stated water quantity and method. A product described as fast setting may still require additional time before fence panels or gates can be fitted. Check the instructions for loading the posts, not just the initial setting time.
A post hole digger can be useful once the excavation method has been assessed, but it cannot tell you whether cables are below the ground. The HSE guidance on underground cables stresses planning, locating services and safe excavation. If service positions are uncertain, obtain competent help and an appropriate locating method before you dig a hole. Stop if an unexpected cable, pipe or obstruction appears.
Gates, Pickets And Details That Need Extra Planning
Gates need their own opening dimensions, hinge arrangement and supporting posts. The post carrying a gate takes loads that differ from an ordinary panel connection. Decide the gate size before setting the fence posts, allow for hinges and the latch, and check the ground clearance through its full swing. Do not attach a heavy gate to a decorative panel frame or a post that was specified only for a small fence bay.
For a fence made from rails and separate pickets, the post spacing and picket spacing are different measurements. Rails span between posts, while pickets attach to those rails. Decide how the pickets will be distributed so the finishing gaps are sensible, and use a spacing guide if the design calls for equal gaps. Check whether those openings are appropriate for the intended use rather than choosing a gap solely for appearance.
Cut boards, rails and framing battens only where the design permits it. A batten that supports a cut-down fence panel needs the correct position and fixings. Repeated trimming can leave inadequate timber around a screw or nail, making splitting more likely. If the intended opening cannot be formed without weakening the panel, ask for a suitable custom section.
Finally, inspect the entire fence from both accessible sides. Check fence panels, gravel boards, post caps, gate latches and trellis connections. Remove temporary fixings and debris, and deal with sharp nails or projecting screws. Replant temporarily moved plants where practical and keep access clear. Record any work still needed before treating the installation as complete.
How To Avoid Repairs That Only Hide The Problem
A loose fence panel may have damaged fixings, but it can also be a sign of a moving post or deteriorating rail. Check the support before adding more screws. If wooden posts are soft at ground level, a new post cap or extra coating will not restore their strength. Concrete posts with damage likewise need assessment rather than cosmetic covering.
When replacing fence panels, check their actual dimensions against the existing openings. Two panels sold under the same nominal width may have different frames or fitting allowances. Check gravel boards and brackets at the same time, and do not force a panel into a narrow bay. Compatible components make a repair more straightforward and reduce the chance of repeated movement.
Keep maintenance practical: inspect after severe weather, correct drainage issues, protect exposed cut ends as specified and repair loose hardware promptly. The aim is to preserve the fence's function as well as its appearance. If you are unsure whether a post, gate support or foundation remains sound, ask an experienced installer to assess it before continuing.
Planning fence installation in Milton Keynes or Buckinghamshire? Contact MD Fencing & Decking to discuss suitable fence posts, fence panels, gravel boards and gates for your garden. We can help you plan the layout and choose a practical installation for your property.